Creating a TinkerBoard Cluster
We are getting ready for another microcluster showcase, and I’m really pleased to see that many people are creating Pi clusters! I thought this would be a great new opportunity for me to test out a board that has long since caught my eye and see how easy it is to build a MPI-enabled cluster out of it.
First impressions
First of all, the TinkerBoard is beautiful. Maybe I’m just a sucker for colors, but I find the PCB to be quite aesthetically pleasing. The tinkerboard is shown below:

The processor is an 1.8GHz quad-core ARM Cortex A-17. There is 2 GB of RAM, onboard WiFi and Bluetooth, Gigabit LAN, and 4 USB ports. This definitely represents an upgrade in specs over your Raspberry Pi 3B+. However, it will cost you – the TinkerBoard costs around $67.00, not including a power supply. The standard 5V/2.5A power supply that you use for the Raspberry Pi 3B/3B+ should work just perfectly for the Tinkerboard.
Assembly of master node
While I will make the image avaiable on my website, the instructions below will walk you through creating your own master node image.
- Download Debian Stretch for the Tinkerboard.
-
Use something like Win32DiskImager to burn the image onto an SD card. If you are confused about this step, consider looking at the detailed tutorial I created several years ago for the Raspberry Pi. It should translate decently well to the TinkerBoard.
-
Pop the SD card into the TinkerBoard and boot it up. Keep in mind that this process may take a little longer than the Raspberry Pi. You will briefly see a Debian screen, before the system continues to automatically log you on.
-
Follow the instructions that I posted (based on a now unavailable tutorial by Simon Cox from South Hampton) to install MPICH on the TinkerBoard. The big changes here are the changes to the path. Your home is now
/home/linaroinstead of/home/pi. Ensure that you keep this change in mind as you configure your PATH variables, etc. - If you did everything correctly you should be able to execute the following
command from your home directory:
> mpiexec -n 2 hostname
tinkerboard
tinkerboard
If this is indeed what shows up, celebrate! You have MPI working on your tinkerboard master node.
Setting up Worker Node (Part I)
The next step is to set up the worker node. The instructions can also be used almost verbatim to set up the worker node. A few important differences:
- commands like
ifconfigandpingare only accessible byroot. Thus, you will need to runsudo ifconfigandsudo ping.
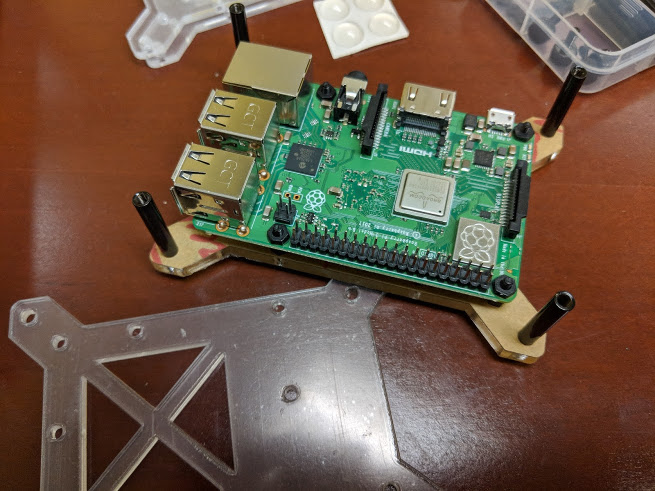
The case came with some basic instructions for assembly, which I found fairly straightforward to follow. The assembly design is pretty clever. To attach a Pi to a single baseboard, requires three sets of parts: 4 washers, 4 screws, and 4 interesting-looking female screws that hold the board up a few milimeters from the actual acrylic board. This makes it fairly straightforward to insert and remove the microSD card. You can use the same set of instructions to connect the Pis to the other middle boards. The metal standoffs can be used to easily connect the baseboards together into a cluster.

Overall, I had a lot of fun putting together this cluster, and I imagine students will as well. I only needed a screw driver to tighten one set of screws, but I was able to do the rest by hand. The one complaint I have is that the parts are SMALL. This is okay for a person like me with smaller hands, but for individuals with larger hands and fingers they may have a difficult time. I tried using the tweezers, but they were awkward to use for tightening.
The other issue is that the kit really doesn’t have any extra screws, which is a big problem. The tinyness of the screws makes them easy to drop and hard to find once they hit the ground. I actually lost one of the tiny washers, so my assembled cluster is missing one. Thankfully, the connection structure of the Pi to the baseboards is so well designed that I don’t get the sense that the missing washer hurts the integrity or structural soundness of the cluster. The other complaint I have is that some of the baseboards still came with the paper backing on the acrylic. This was not easy to remove, but I was able to do it with some concerted effort and a chipped fingernail. The final assembled cluster is shown below:

Final Assembly and Booting up the cluster
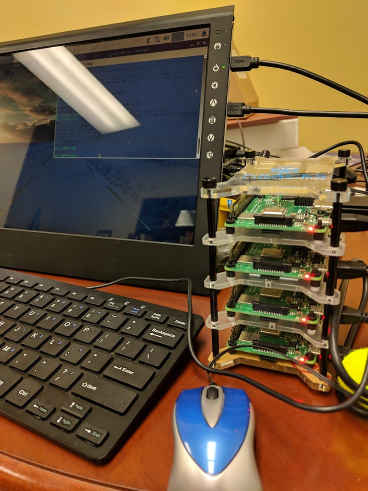
Of course, the PiRacks do not come with most essential items. In addition to the Raspberry Pis and power supplies, you will need some sort of switch/router, I/O devices (monitor, keyboard, mouse), and a Raspberry Pi image with MPI on it. To make this all work, I needed to create an image for the Raspberry Pi 3B+, which is now conveniently on my website. Like the older images, this one comes with MPI installed, and tested to work over all the nodes. Here is a picture of the cluster booted up, with all the components connected:

So how much does this cluster cost?
| Name | Price |
|---|---|
| PiRacks Cluster Set | 32.95 |
| Raspberry Pi (x4) | 140.00 |
| 8GB MicroSD card w/adapter (x4) | 23.92 |
| CanaKit Power supply (x4) | 39.96 |
| Ethernet Cables (x4) | 8.00 |
| 4-port Router | 20.00 |
| Total | 264.83 |
Note that I am not including the cost of I/O devices (keyboard, mouse and monitor) in this estimate.
Of course, some money could be saved by buying some of these quantities in bulk, or by buying custom power supplies (though I’m not sure how good the latter would be for clasroom use). You could also cut $60-$120 off the cost by reducing the number of Raspberry Pis down to 3 or 2. I’d argue that 3 nodes is perhaps the minimum you’d want for a reasonable parallel example. Doing so will reduce the price point to around $200 or less, which is similar to the cost of a college textbook.
Final Thoughts
Overall, I was pleased with PiRacks. Since the Raspberry Pi B+ was released back in 2014, the form factor of the Pi has barely changed. Assuming the Raspberry Pi Foundation continues to keep the form factor constant, I anticipate that PiRacks will be re-usable with future boards.
Compared to the 3D printed case that I co-designed, I think the PiRacks is perhaps slightly more expensive in terms of raw materials (we estimated that it costs about $5 per node for our case, so $20 total), if you don’t have a 3D printer, the PiRacks is a great solution. Furthermore, I have gotten complaints that on certain 3D printers, the connectors do not fit tightly enough with the baseboards, which means they fall apart easier. This is not an issue you will have with the PiRacks. Be careful about the tiny parts though! I certainly kept on dropping them during assembly.
Regardless of what option you choose, both PiRacks and the 3D printed case are simply case designs. To create a cluster, you will need to buy Pis, power supplies, a switch/router, etc. A complete cluster solution they are not. However, I find the PiRacks a good alternative to the 3D printed solution for classroom use.